Makeup can sometimes be more fun to apply than actually wear because it gives us that pampering time to do something just for ourselves and a meditative state to play with our collection – and that’s where makeup brushes can really play an important role.
Of course, you need good-quality makeup products for the best results, but the real secret lies within the tools. Great makeup brushes or sponges and knowing how to use them properly can make a world of difference for your overall look.
There are, however, so many types of brushes on the market, and with so many choices, from drugstore to high-end to professional brands, it’s easy to overbuy or not get anything at all/. So in this piece, we’ll discuss what are the best brushes, how many do you actually need to cover all steps of makeup application, and finally, how expensive is too expensive when it comes to these precious tools? Fear not because we have all the answers for you in this comprehensive guide to makeup tools and how to properly use them.
For more details and information, please check out this video on makeup brushes:
How Many Makeup Brushes Do You Actually Need in Your Collection?
The amount of brushes you need depends very much on your makeup style (how simple or complicated you like it) and on your passion for makeup tools. There are, however, a couple of must-have brushes everyone can benefit from – some are even multi-use.
You will need a few brushes for your face, to apply cream and powder products, and quite a few for your eye makeup. Most of the time, eye makeup requires the biggest number of tools and is the most time-consuming task. Even though the surface is tiny, getting that gradation of colors and so many precise details means you need to dedicate some time and have a few brushes on hand.
You need a basic kit for the main steps of applying full makeup, and you can go from there and grow your collection if you desire. You can buy individual brushes, or you could go with sets. Generally, you will find makeup brush sets for different face parts, such as eye or face sets. These can be very useful and sometimes less expensive than buying individual ones, but before purchasing a set, look carefully if you could use every brush in there. If you notice some seem useless, or you already have one or two identical ones, you probably won’t get the maximum use of that combination.
High End vs. Drugstore Makeup Brushes
The simple answer is: you don’t have to buy expensive makeup brushes for quality. You can find many affordable brushes that do an excellent job at the drugstore or in specialized online stores that won’t cost a fortune.
The shape and the quality of the bristles are key here. Look for brushes that can serve each purpose well, and even imagine what other uses you can give to them. After all, makeup has rules and theory, but it also leaves a lot for our imagination or creativity to play with.
In the following section, we give you a comprehensive guide to choosing the best brushes for each step of the makeup process. They very much depend on the size of the area you want to cover and the type of product you’re working with, whether cream or powder. Please keep reading to get the full know-how on makeup brushes.
The Best Eye Makeup Brushes
The eye area requires many brushes because having separate brushes means creating a variety of colors and effects. You will need a different brush for every color you place here, on the whole mobile lid, in the crease, or in the outer corner, and most importantly, a blending brush to melt them all together seamlessly.
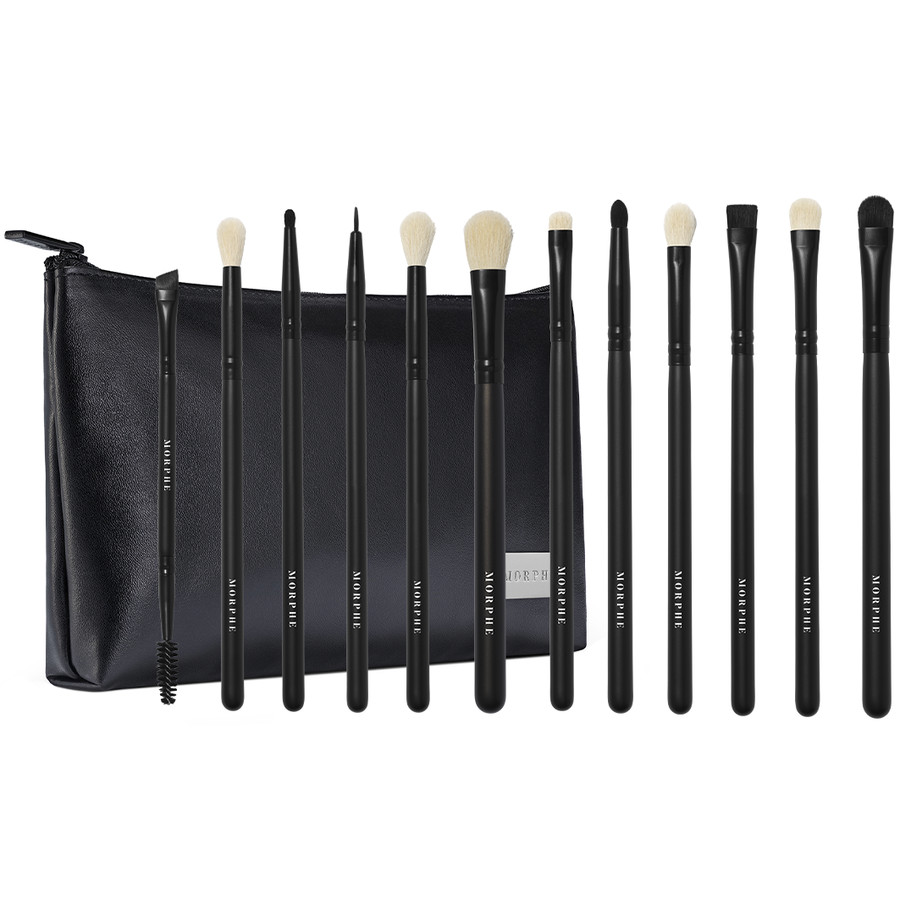
You can also choose a brush set that contains everything you need for a full eye makeup, like this great one from Morphe:
- Morphe Eye Obssesed Brush Collection
Here are the best individual brushes for your eye makeup:
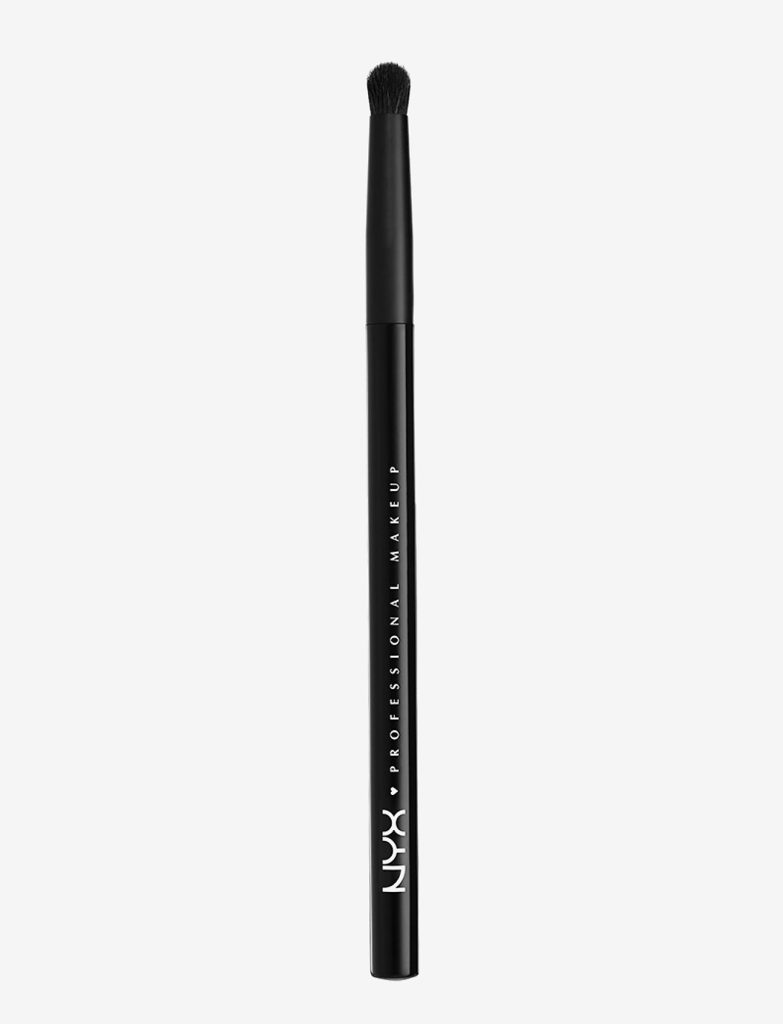
Best Eyelid Primer Brush
- Nyx Professional Makeup Pro All Over Shadow Brush
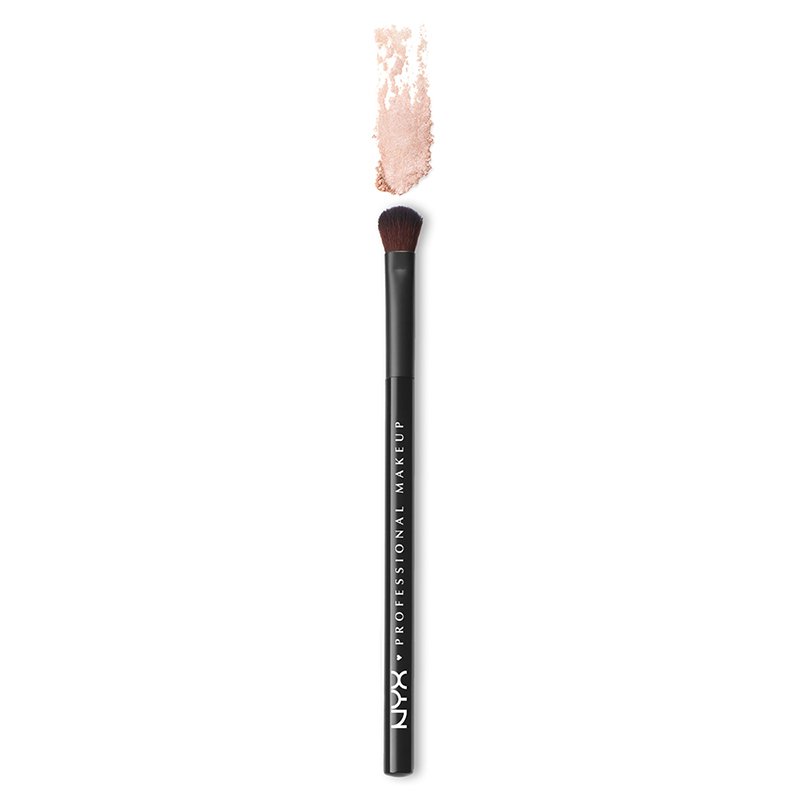
When you start your eye makeup, you need to create a proper base, so your eyeshadows will adhere and blend properly on top. It’s best to use a special eyelid primer that is generally silicone-based; this will keep the skin’s natural oils at bay for many hours by creating a barrier between the eyelids and the makeup layer.
You can apply your primer with your fingers, but make sure to have very clean hands and use only gentle pressure. Or you could use a brush to distribute the primer evenly and gently push it into the skin.
For this, you need a pretty large brush in terms of eye tools, so you’re able to cover a larger area quickly. The bristles should be rather long but densely packed and firm, pushing the product onto the skin, creating an even layer of product.
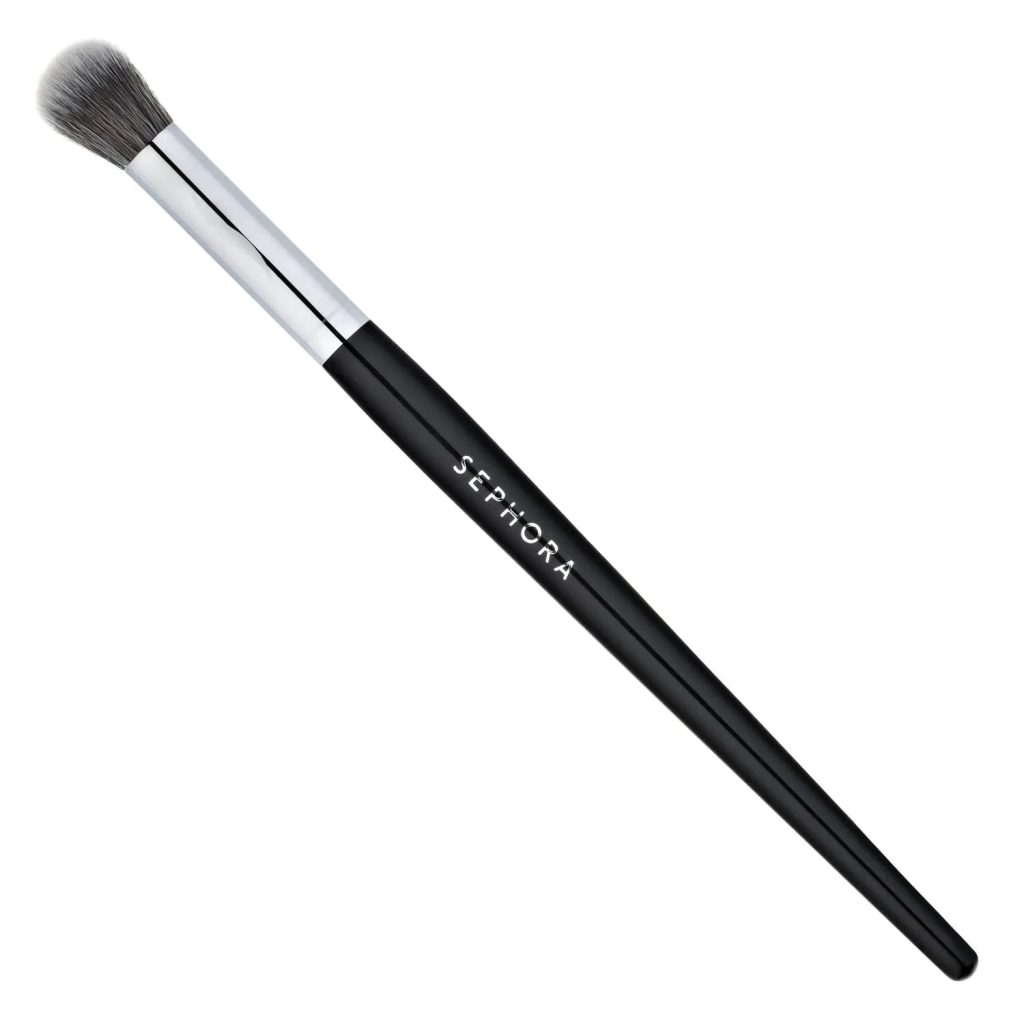
Best All-Over Eyeshadow Brush
- Sephora Collection Pro Shadow Brush No 10
This next type of brush is similar to the eyelid primer one because this too needs to cover a larger area. You use an all-over shadow brush to cover the whole eye area with a light wash of color that is meant to create a uniform base for the color placement.
This brush needs to be wide and flat, with densely packed bristles. You don’t want a fluffy, blending brush type because the purpose is to pick up enough eyeshadow that you have to pack onto the skin, not move it around.
You can also use this all-over shadow brush to put a light shimmery color onto the inner third of your mobile lid, keeping the outer V darker. Again, you need those densely packed bristles to get the best color payoff from your eyeshadow, and you can do this by pressing the color onto the lid with tapping motions.
Best Mid-Tone Eyeshadow Brush
- Morphe x Jaclyn Hill J51 Nice & Precise Brush
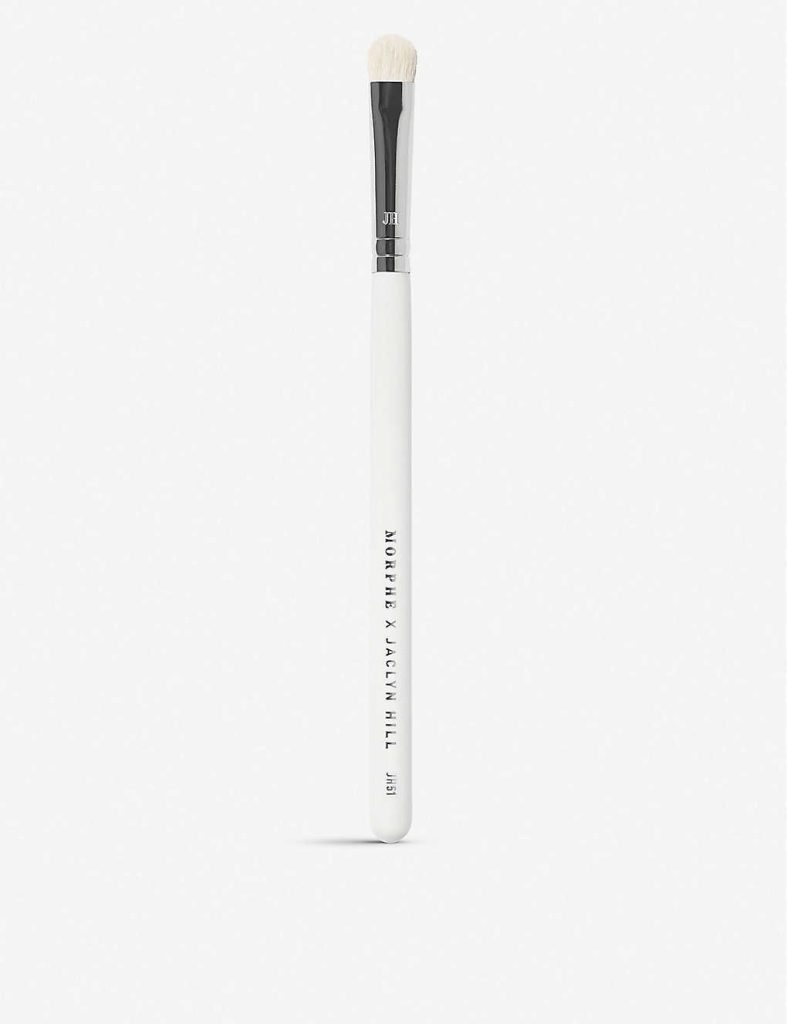
Now that you’ve applied your base, it’s time to start building color intensity and deepen the eye look. For this, you need a medium size brush with flat and firm bristles that can pick up color from the eyeshadow palette.
You can use this brush to place a medium-tone shade on the outer half of the eyelid, with firm pressing motions, and then take it into the crease. This will start creating a base for your darker shades and give dimension to the eyeshadow look. This type of brush shouldn’t be too wide because the product would go all over the place. A medium-size, so you can concentrate that color just where you want it, will be perfect.
Best Outer Corner Brush
- Makeup by Mario E5 Makeup Brush
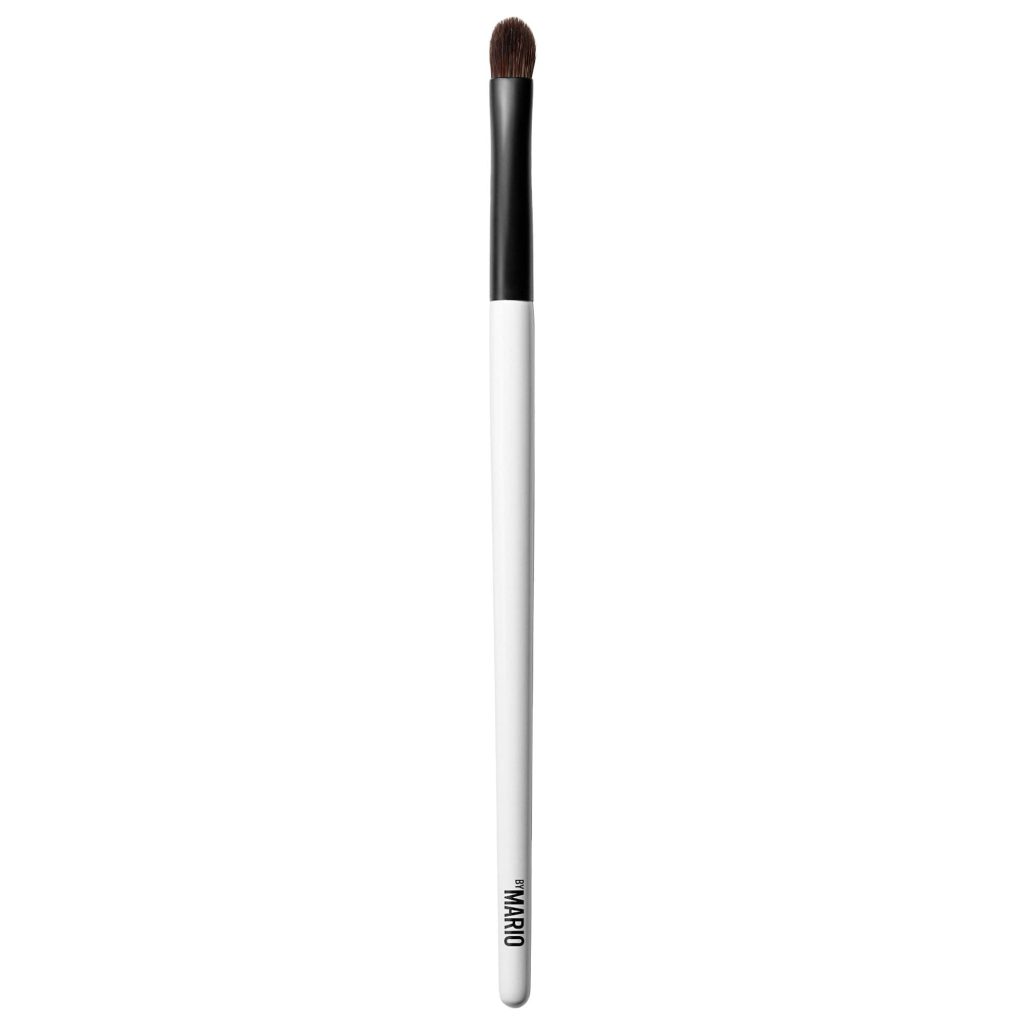
The outer corner brush is usually an even smaller brush, very flat, with firm bristles to keep building color intensity. It is used to put the darkest shade in the outer corner of the mobile lid, creating a V shape. This will deepen the makeup and take it to a whole new level of intensity.
It is a smaller brush that contains the darker color in a controlled area. If too large, the eyeshadow would go on a large area and then be distributed all over the place when blended. The key is always to have the right-size brush for each step of the makeup, so you can achieve the best results.
Best Pencil Brush
- Bdellium Tools Professional Makeup Brush Studio Line – Pencil Shaped Blending 780
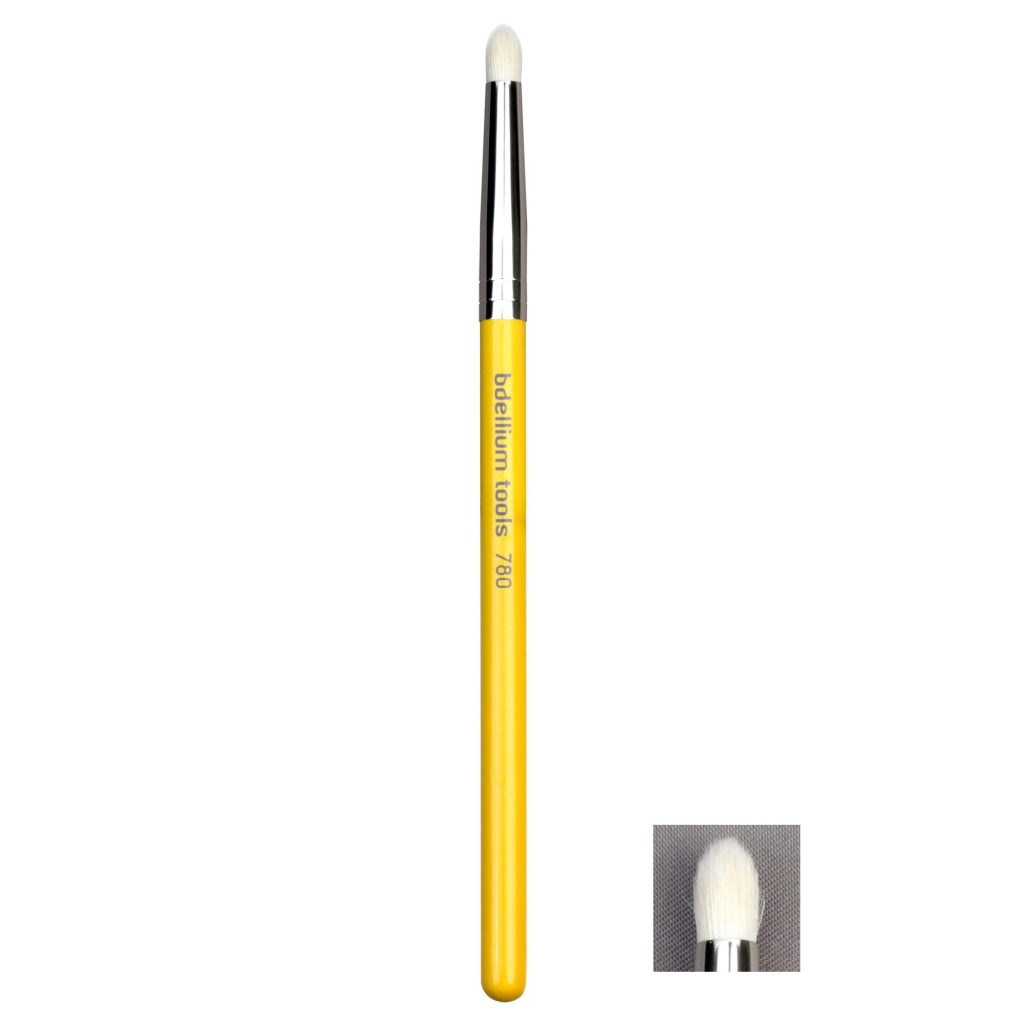
To give the outer corner even more definition, we can go into more details using a pencil brush. This type of makeup brush is versatile because you can use it to create a V-shape with your eyeshadow in the outer corner, smudge an eyeliner by dipping it into a dark shadow, or define your lower lash line.
A pencil brush looks like a cylinder, so it’s a rounded brush, and it can be domed or tapered into a point where it ends. Either way, it’s amazing for adding definition to your eye makeup, with small accents of color. In my view, this type of brush is indispensable from any makeup kit.
Best Blending Brush
- Morphe M453 Crease Blending Brush
Speaking of must-haves, let’s talk about blending brushes. Probably the most important thing with eye makeup is to blend, blend, blend! After we’ve deposited all those different shades of eyeshadows, we need to melt them into each other so there are no harsh lines in between. We want to achieve a soft gradation of color, so the transition between the different shades, from dark to light, is seamless.
We can get this effect with a proper blending brush and a little patience. This type of makeup brush needs to have long and loose bristles that can diffuse the color evenly without creating streaks. Look for soft bristles brushes because the delicate eyelid skin can become irritated, with all the circular and back and forth blending motions.
As for shape, blending brushes can be circular, with a domed shape, or tapered ones that come to a point. The latter is best for depositing a transition color into your crease because the point deposits the shade into that small crease area while the wider edges blend it.
Another option of blending brushes is flatter, instead of circular, but these differ from the previously mentioned mid-toned or outer corner brushes by having fluffy and loose bristles that can softly blend color.

Best Small Flat Brush for Eyeliner
- Nyx Professional Makeup Pro Flat Detail Brush
- MAC Synthetic Small Angled Brow Brush

We need a very small flat brush to add definition to the lash line. The bristles on this type of tool have to be very short and firm, so no wiggling around. To finish off your makeup look, you can use this brush with a dark eyeshadow and run it across the upper lash line.
If using a pencil, you could also use the edge of the brush to smudge the pencil and create a softer, less defined line. Then, dip the upper edge of the brush into a dark powder eyeshadow to further blend the pencil while at the same time setting it in place for a long-lasting effect.
You could also use a flat angled brush to define your lash line. This would go perfectly in such a small area, and it’s very easy to use.
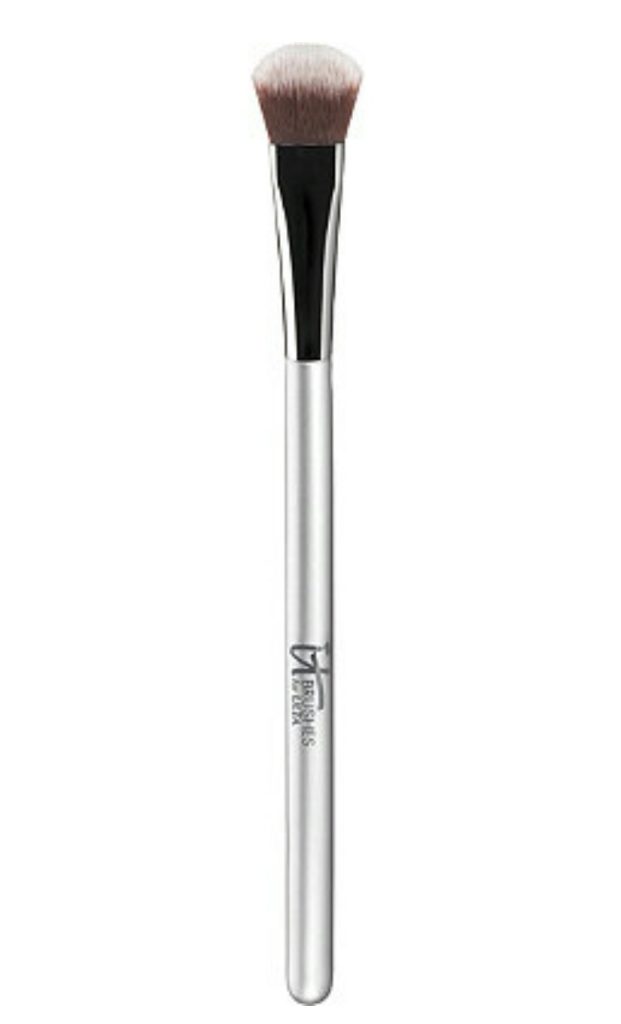
Best Brow Bone Highlight Brush
- IT Cosmetics All Over Shadow Brush
A brow bone brush will add a finishing touch with a highlighting powder when you complete your whole eye makeup. You can do this by choosing a light satin finish shadow from your eye palette or even using a face highlighter.
No matter what product you choose to use, the brush needs to be medium to large size, with pretty firm bristles. A good brush for this process will be flat and come to a point, so you can get right underneath the brow and run that highlighter towards the outer edge. Make sure you blend that color as you go, so there are no harsh, visible lines in between.
Best Brow Brush
- Lancome Eyebrow Reshaper Brush
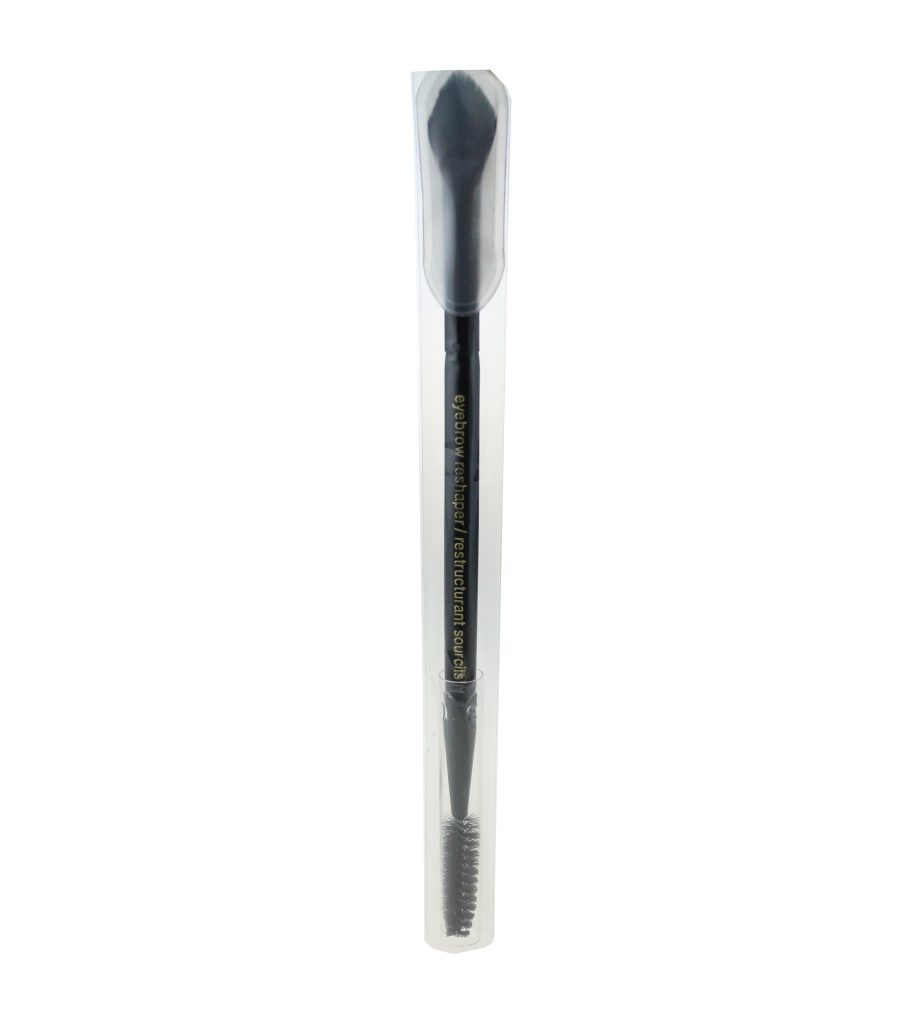
Defining your brows is essential when doing a full makeup look because it just frames your face, giving you a great finishing touch. But please make sure that you don’t go overboard with this step because it’s very easy to go from defined brows to an overdone, weird look. Keep the color a little lighter or match your natural brow hairs, never darker, and use soft strokes, always brushing the excess off.
For this process, the standard brush is a small, flat angled brush that comes to a point on one of the edges. That type of brush works just fine for filling in the brows, but I want to show you a very interesting alternative.
I am talking about this very unusual Lancome brush; it’s double-ended, so you have a combat one of the ends, so you can brush through the brows as you go. But the novelty comes from the other end, where it has a flat brush that is almost a diamond shape. It comes to a very sharp point, which will help you create hair-like strokes when filling the brow.
You can also use the edge to fill larger areas or to create a line underneath the brows if you find they are very sparse. The effect is very natural, and the brush is so easy to use you will never look back!
Best Face Brushes
Eye makeup may be the most time-consuming, defined by many small intricate details, but it’s the face makeup that gives the general tone of your look, so creating a flawless base is key.
By having the right tools and knowing how to use them step-by-step, you can get perfect results every time. Please keep reading to get all the must-have face brushes to a natural-looking base, perfect for us gals in our prime:
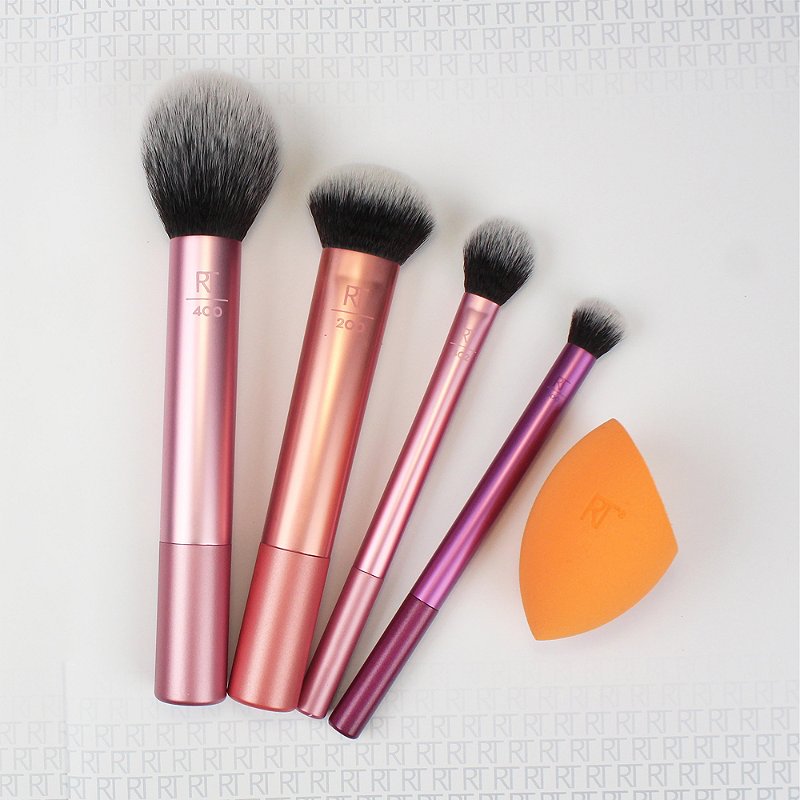
If you want to skip a few steps, you can always buy a face brush set that has all the essentials. They are great starting points, and in time, you can build from that and add more brushes. Here are some excellent options:
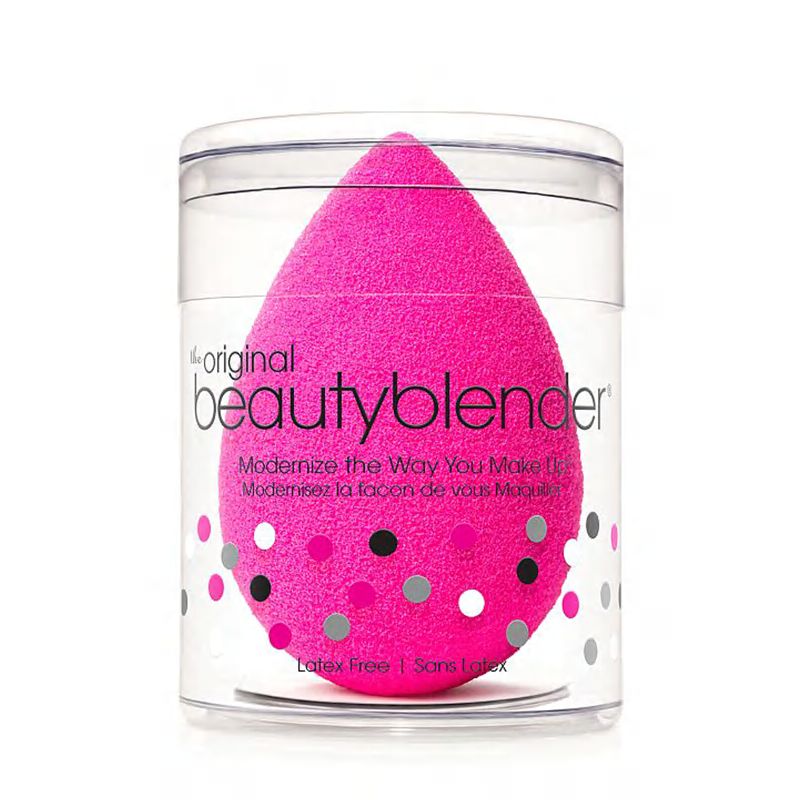
Best “Beauty Blender Type” Foundation Sponge
- Beautyblender Original Beautyblender
- Real Techniques Miracle Complexion Sponge + Miracle Powder Sponge Set
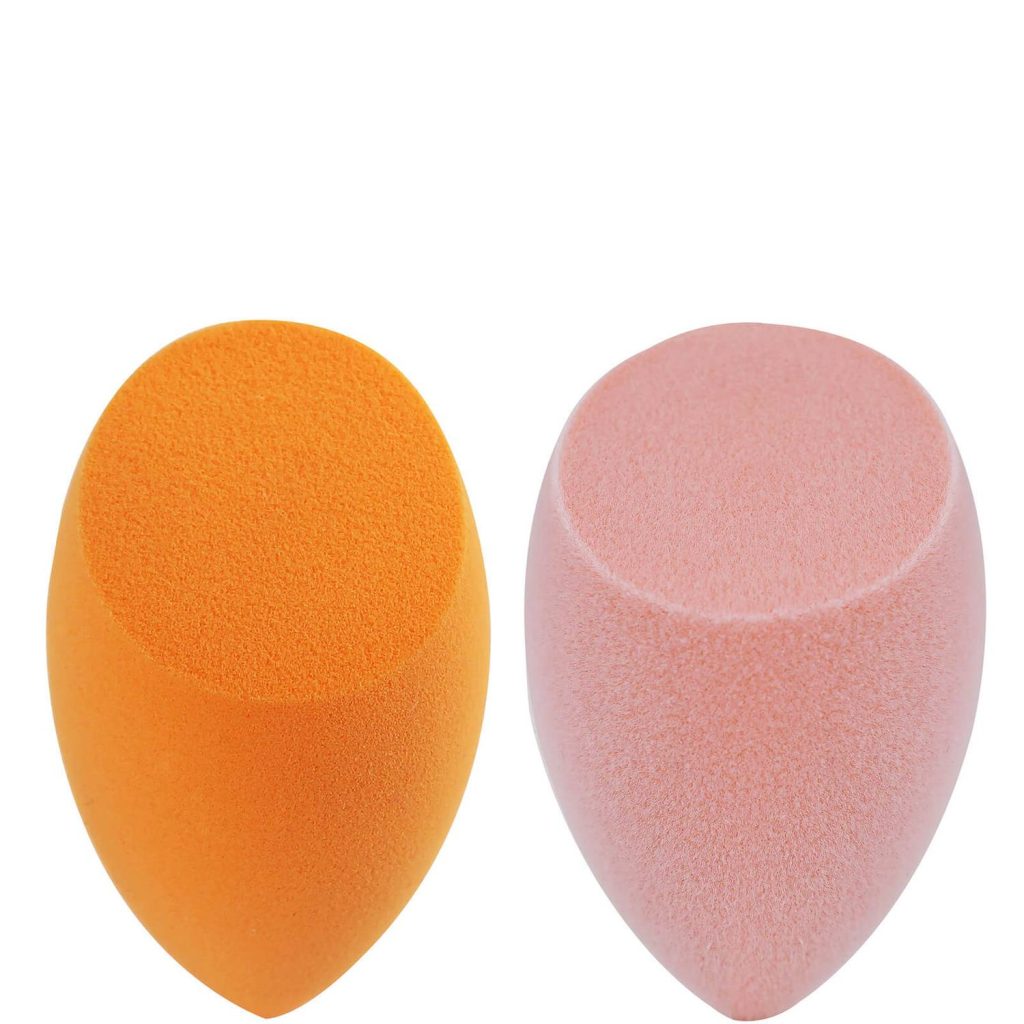
A beauty blender-type sponge can be a very useful tool in your makeup kit. They usually come in an egg shape, with a pointed end, and are very dense yet bouncy. For a seamless effect, you have to use them damp; it’s best to wash them just before use and just squeeze them in the palm of your hand.
For a flawless effect, you can use the bigger end to blend your foundation; just dab a small amount of product on a portion of your face. Start bouncing that sponge to blend, using tapping motions, so no dragging the product around. If needed, add more product until you’re happy with the result.
You can use the pointed edge for smaller areas, like around your nose or the under-eye. The small edge is excellent to get right in those narrow parts, giving them a soft blended look.
The soft sponge and the fact that it’s damp will give a flawless and very natural effect. But keep in mind that this method will give lighter coverage than a foundation brush because the sponge absorbs more product.
Also, if you have very dry and flaky skin, using a sponge is a better option for cream products because the bristles of a brush will likely raise those scales to the surface. This will emphasize the dry areas, and the cream products will cling to them, giving you a not-so-flattering look.
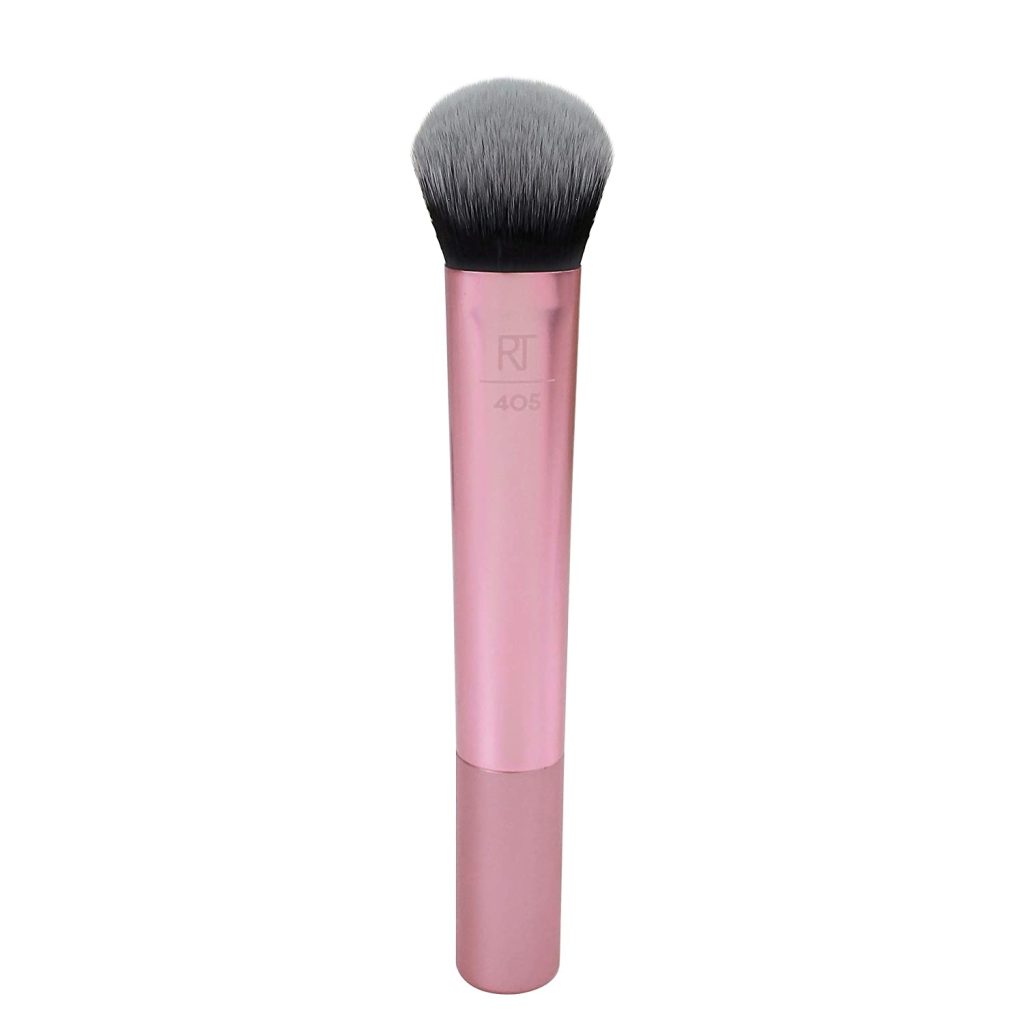
Best Foundation Brush
- Real Techniques Seamless Complexion Makeup Brush
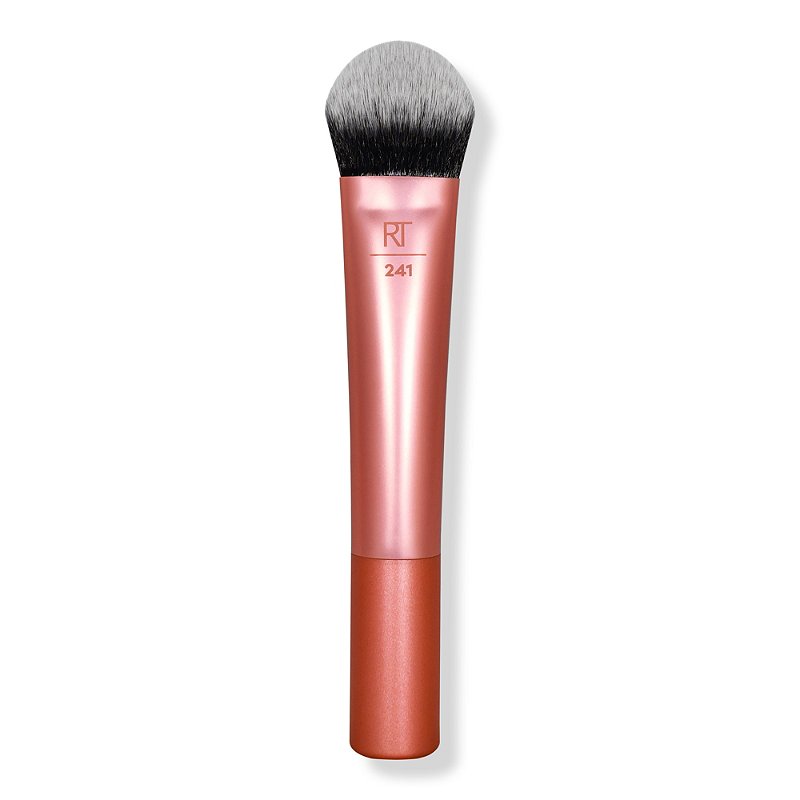
There are a few different options for foundation brushes, and the main variations come from the shape and the density of brushes.
I recommend you use a flat brush that has densely packed bristles, so it can pick up product and push it onto the skin. The brush also has to be wide enough because you are covering a big area, meaning your entire face, and you don’t want to spend a lot of time doing that.
Use a synthetic brush for cream products because the natural ones generally absorb too much product and don’t distribute it well. Use this brush with a liquid or a cream foundation by picking up a little product at a time then laying it onto the skin in downward motions. If you see areas where the foundation is patchy, you can go over it with a damp sponge for a more seamless blend.
Other options for applying foundation are dense kabuki brushes with a flat top, or stippling brushes with two types of bristles, to achieve a soft blending effect. Whatever you choose, make sure you blend your foundation properly and take it right to the hairline, your years, and down your neck to avoid harsh demarcation lines.
Best Concealer Brush
- Real Techniques 210 Expert Concealer
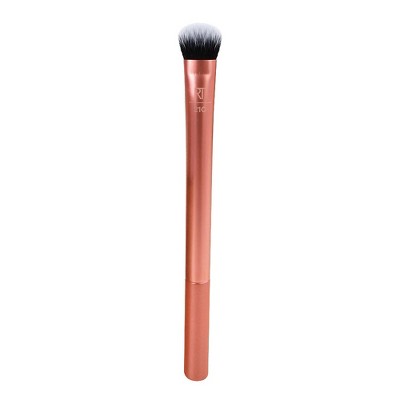
For applying concealer, you can choose a smaller brush of about the size of the under-eye socket. Much like the foundation brush, the bristles need to be pretty densely packed and firm but still soft enough for this sensitive area.
You can use the brush to gently pat the concealer into the skin, starting from the inner corner and making your way outwards. The narrow edge of the brush will help you get the concealer right underneath the lower lash line. Putting some coverage here is important since we often tend to get a little red in this area
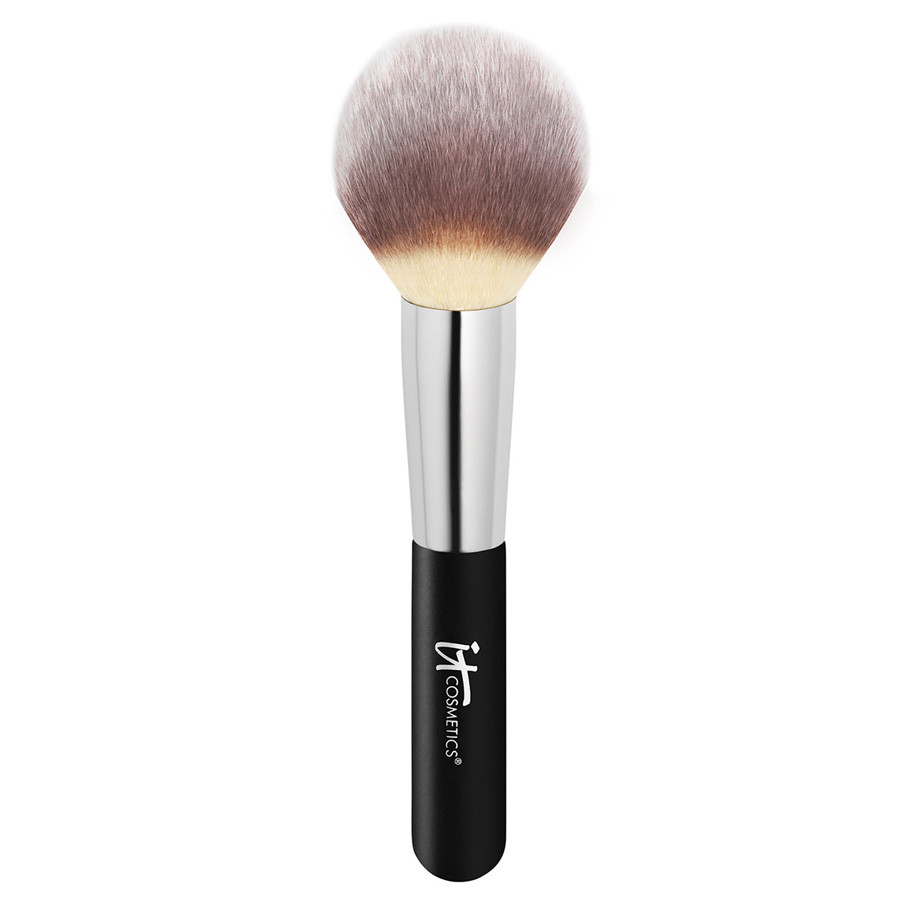
Best Setting Powder Brush
- IT Cosmetics Heavenly Luxe Wand Ball Powder Brush No 8
- EcoTools On-The-Go Retractable Kabuki Makeup Brush
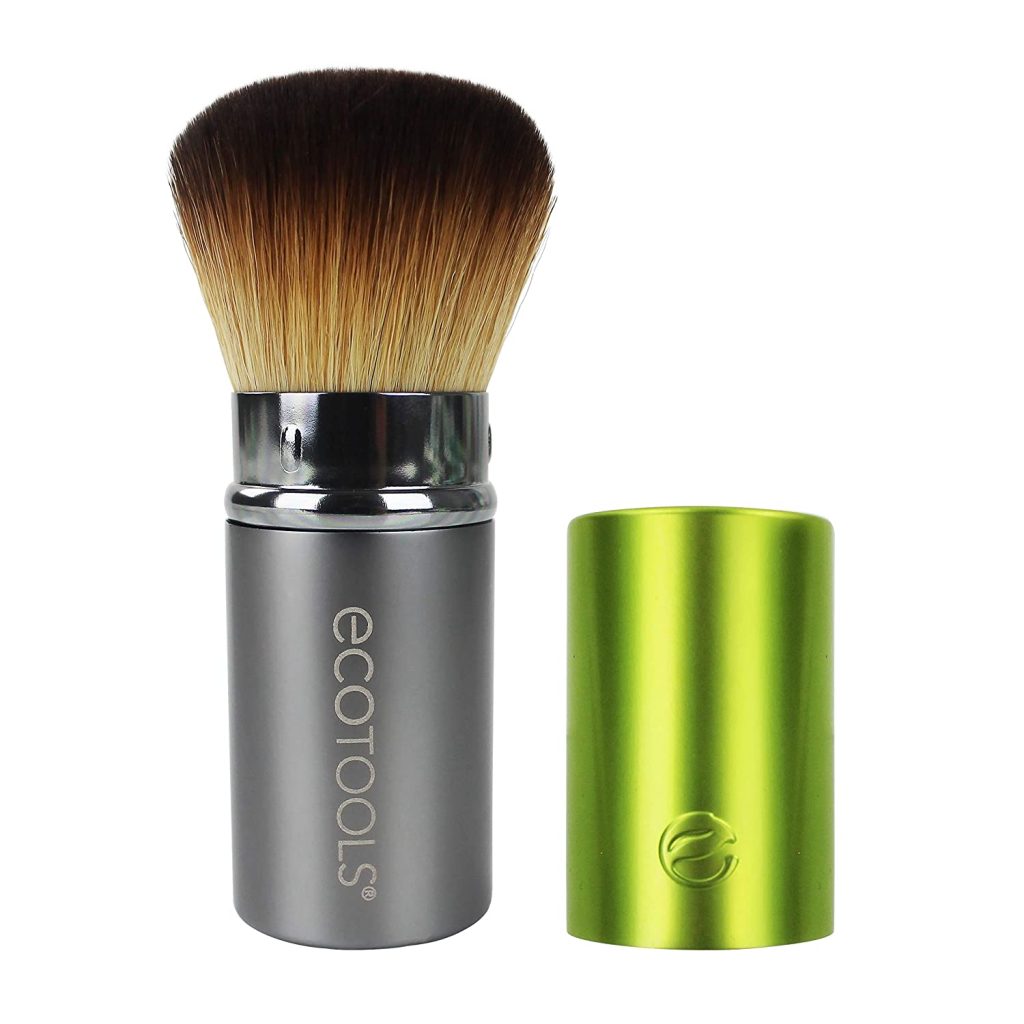
The liquid products, such as concealer and foundation, need to be set into place with a powder. For this, you will need a large makeup brush to cover a wide area fast; go for a domed, fluffy, and not too compact one. If the bristles were too densely packed, they would pick up too much product, and the overall look would be very powdery and dry.
The best way to use a powder brush is to put a small amount of loose powder in the lid, swirl the brush around in circular motions, pick up the product, then tap the excess. Apply the powder to the face with a gentle tapping motion, as swiping the brush left and right might move cream products around.
You can also use a powder puff or even a clean side of the damp beauty blender for this process. The issue is the sponge or the puff will densely pack product on, while a fluffy brush would give a softer effect.
Best Flat Top Contour Brush
- IT Cosmetics Heavenly Luxe Flat Top Buffing Foundation Brush No 6

- Morphe Small Flat Angled Contour

The first type of brush I am going to mention here is a flat top one for a soft face contour. You can also use this brush with a bronzer because it is wide enough to cover pretty large areas, making the makeup look natural.
The flat-top helps with the precision of where you place the product and gives you a firm contour. You can move it back and forth for a softer effect, and this way, you won’t leave any harsh, definite lines.
The second type of brush is a flat one that comes at an angle. This makeup brush is useful for a more defined contour, such as your nose, to make it look slimmer. You can also use this tool in the hollows of your cheeks, but make sure to blend the product well with a wider brush.
Best Blush Brush
- Real Techniques Instapop Cheek Makeup Brush
- Sephora Collection Pro Blush Brush No 96
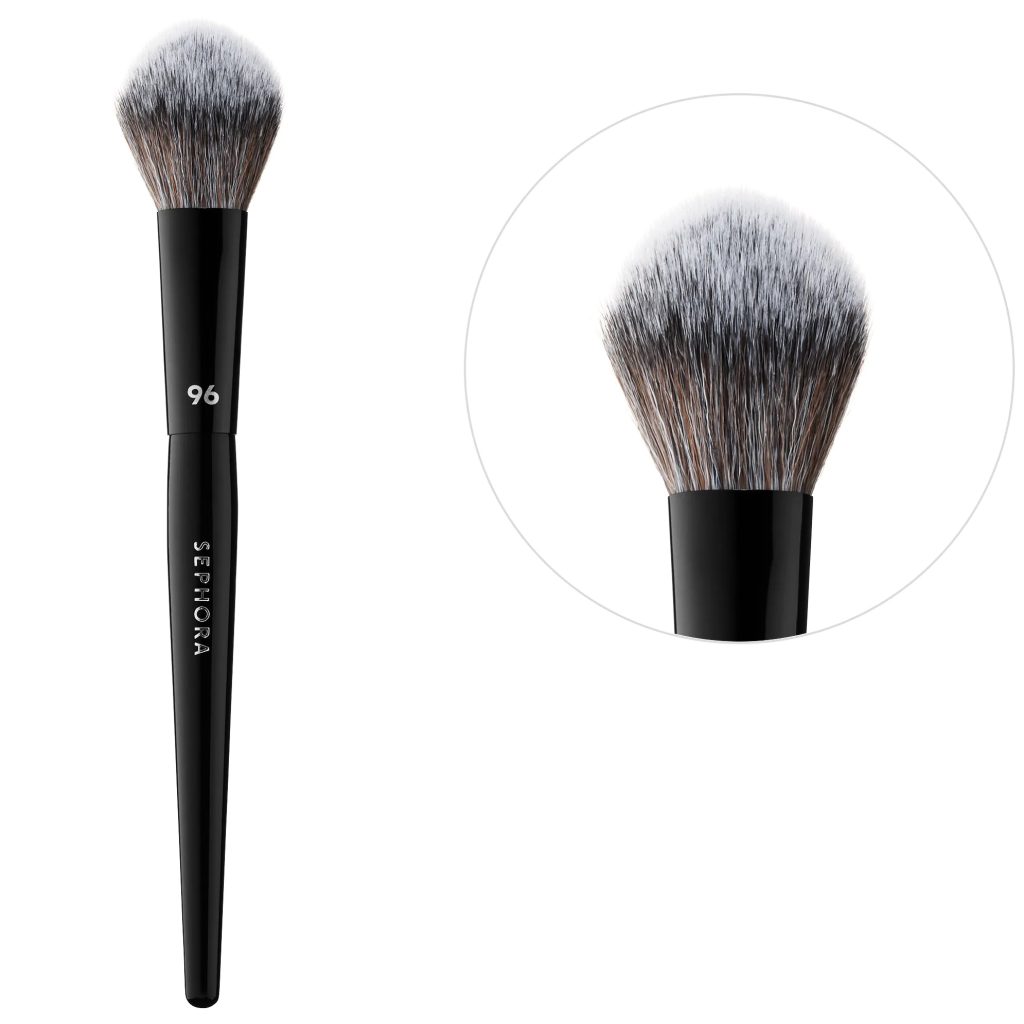
- Sigma F36 Tapered Cheek Brush
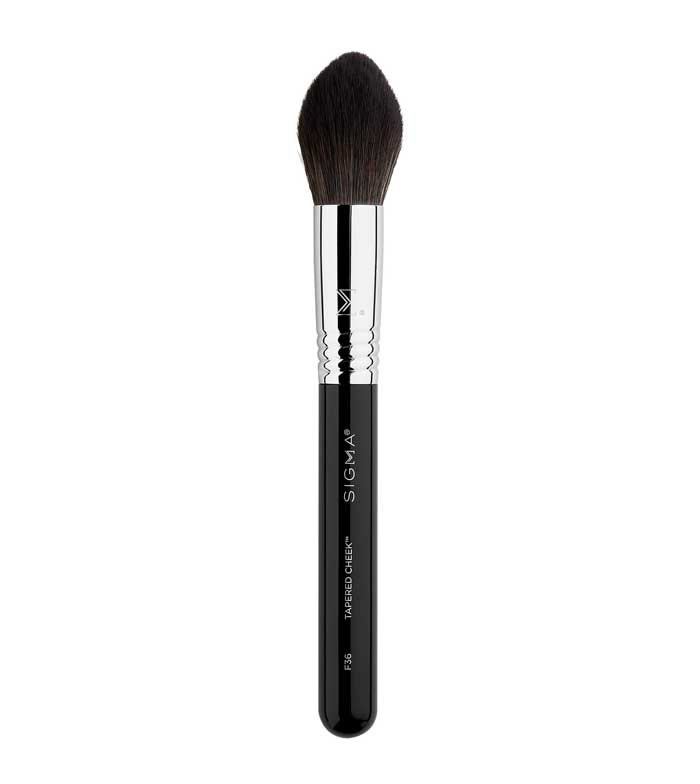
A blush brush should be a medium size that is dome-shaped or tapered (coming to a point at the end). The bristles shouldn’t be too firm because we want to achieve a soft-focus effect; harsh lines and a big concentration of color will give an overdone look.
As stated above, we need to go smaller than a powder brush here because this way, you can focus the blush where you need it, meaning on top of the cheekbones. If you have a large brush, the blush can end up on a wider area, such as towards the jawline, dragging your whole face down.
We all have enough trouble with gravity being over 50, and we don’t need to help that process with makeup mistakes! So keep your blush brushes a medium size and the makeup upwards and as flattering as possible.
Cream or liquid blushes blend perfectly with a damp beauty blender or with a stippling brush; this is a duo-fiber brush that ”melts” creamy products into the skin, so it will give a very natural effect, without moving the base underneath.
Best Highlighter Brush
- Nyx Professional Makeup Pro Fan Brush
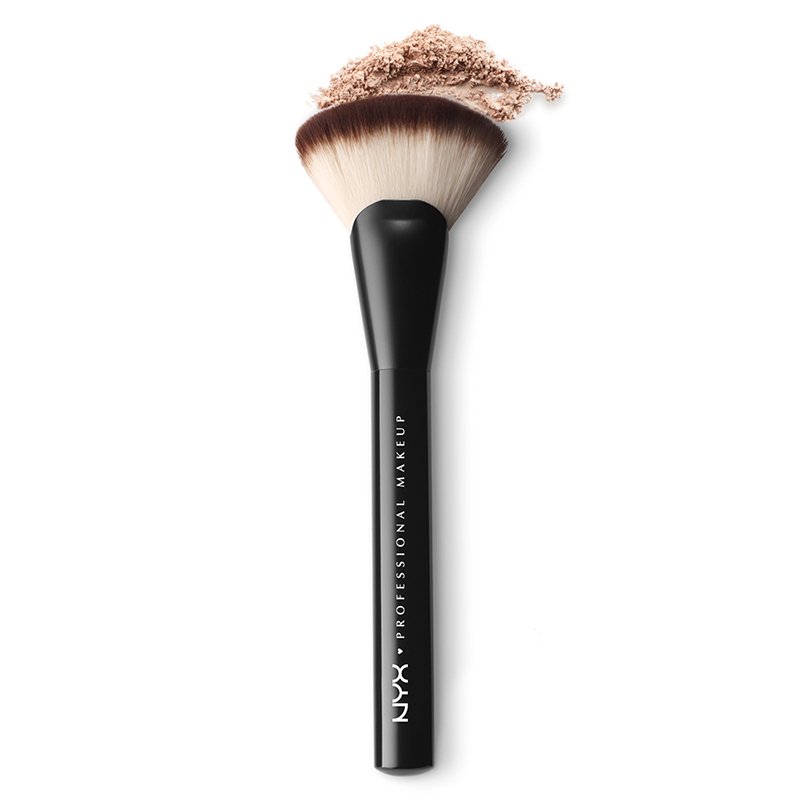
After you’re done with the face contour and blush, it’s time to add the finishing touch with a little sparkle. I am talking about highlighter, which is a great method to achieve a glow-from-within look if you know what you’re doing.
The most popular type of brush for this particular product is a fan brush, and I can see why. It is a flat type of brush that flares from the handle into a fan shape. You can pick up the powder highlighter with the edge of this brush and apply the product on the high points of the face using a swiping motion.
A fan brush picks up just the right amount of product, and it blends the highlighter while applying it to the face. Be sure to buy a soft-bristled one, so you don’t make any flakes angry when using it.
The Best Lip Brush
- MAC 318 Synthetic Retractable Lip Brush
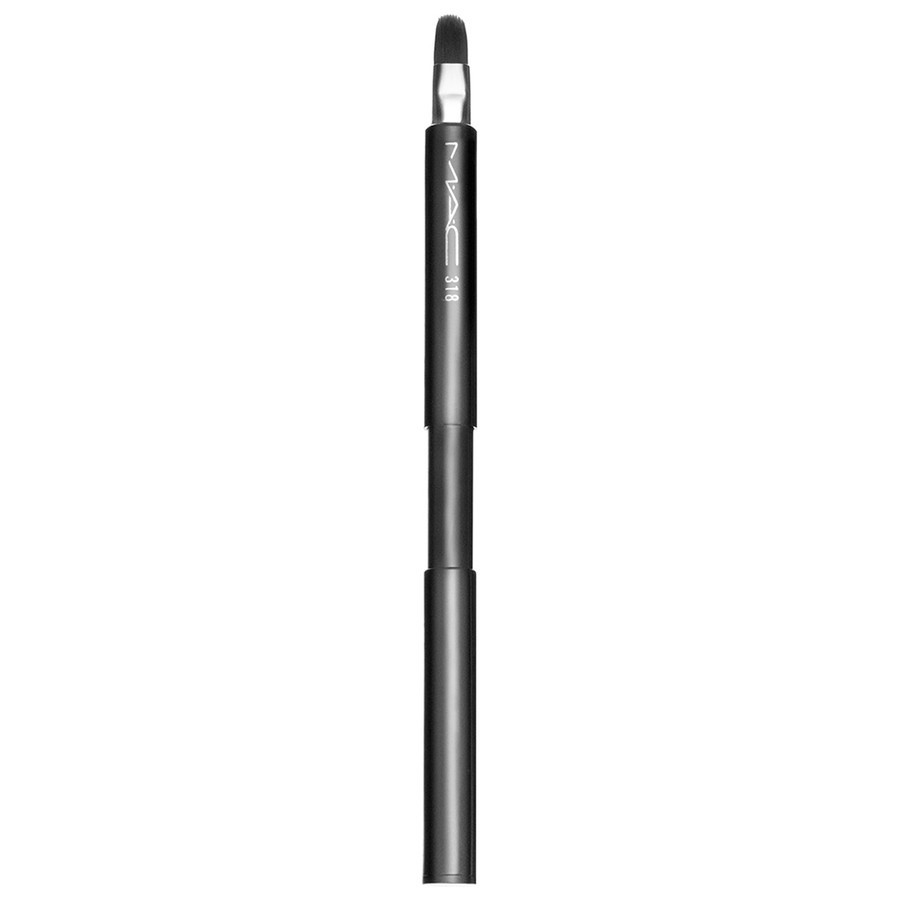
You’re probably wondering why you even need a lip brush if you can easily apply your solid or liquid lipsticks straight from the package. The answer is simple: you can create more definition and long-lasting effects by using a brush.
You can take the lip brush to push the cream lipstick onto the skin and create almost a stain of color that will last better throughout the day. Try taking the edge of the brush to define the edges and give a good contour, then take your ring finger and slowly pat that for a softer effect.
The main objective with a lip brush is to be retractable, with a lid on, so you can carry it around in your bag. This way, you can touch up anytime you want, without getting lipstick all over the items inside your bag.
As for shape, a good lipstick brush is very small, flat, with firm bristles, so you can really deposit the product onto the skin. The end is generally rounded, but it can come to a point.
How to Clean, Dry, and Store Makeup Brushes to Keep Them in Top Shape?
Applying makeup is all fun and games, but we also need to be careful with hygiene. And this means to be mindful of how we store our makeup products and keep our brushes clean. If not properly cleaned, they can store all kinds of bacteria, and it can cause serious issues, especially those that touch-sensitive areas, like your eyes.
How Often Should I Wash My Brushes?
Many wonder how often you should clean your makeup brushes, if you have to do it every time you use them, or just once in a while?
The answer depends very much on what type of products you use them with if it’s a liquid/ cream or a powder. Brushes used with liquids tend to develop bacteria faster because that humid environment promotes that. So the rule of thumb is to clean those brushes that you use with foundation, concealer, or lipsticks after each use, if possible.
When talking about the brushes you use with powders, so those for eyeshadows, face setting powder, contour, or blush, you don’t have to wash them after each use. I would say give them a cleanse every week, or wash them if you change the color scheme completely.
After all, you wouldn’t want to use an eyeshadow brush that is filled with black pigment to put on a brick-red light eyeshadow, would you? That would look quite muddy and ruin your whole eyeshadow look.
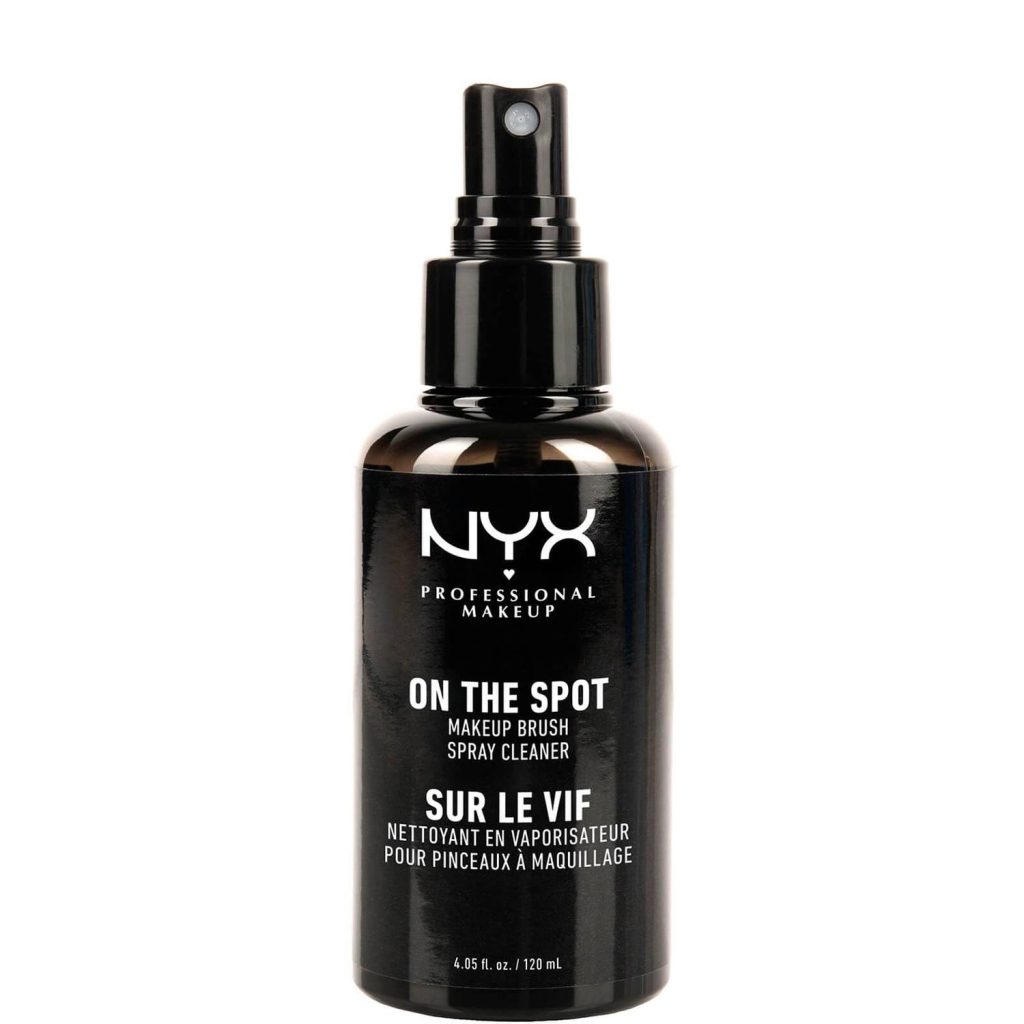
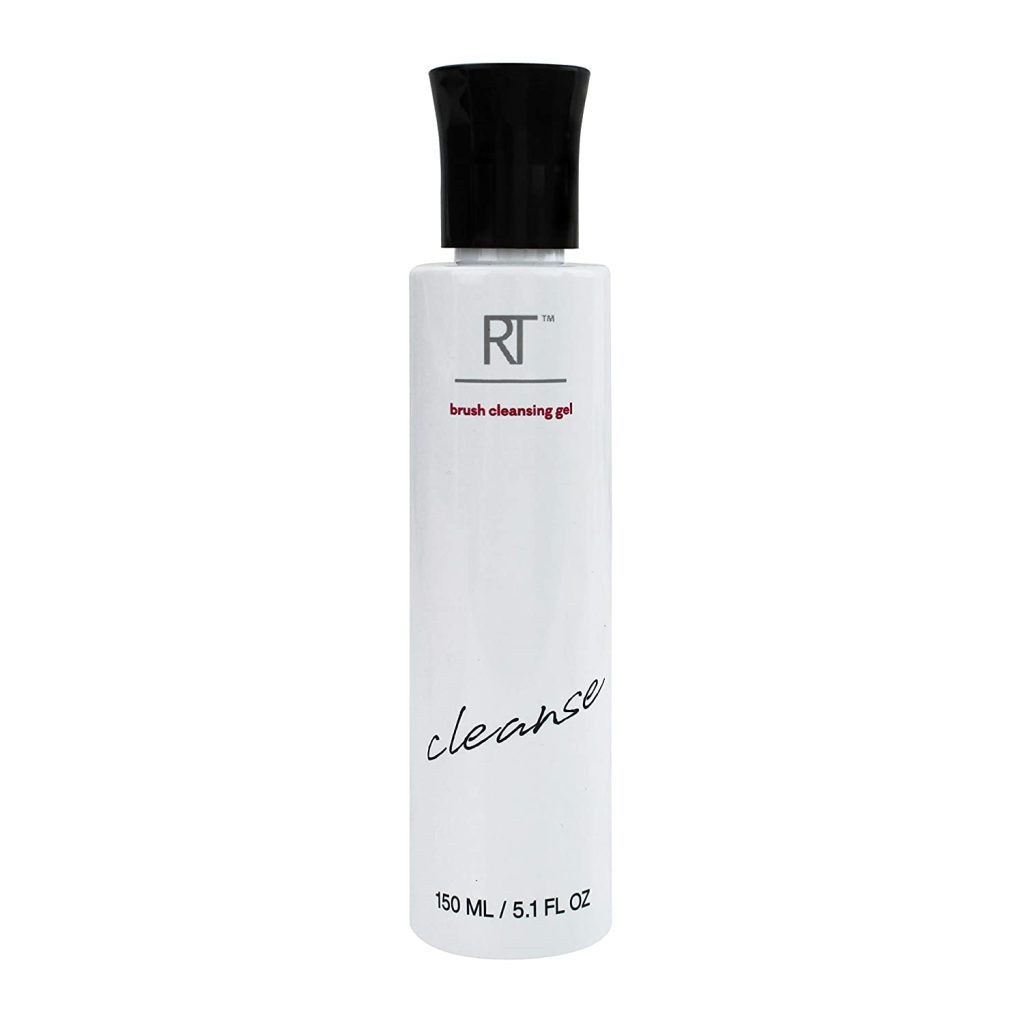
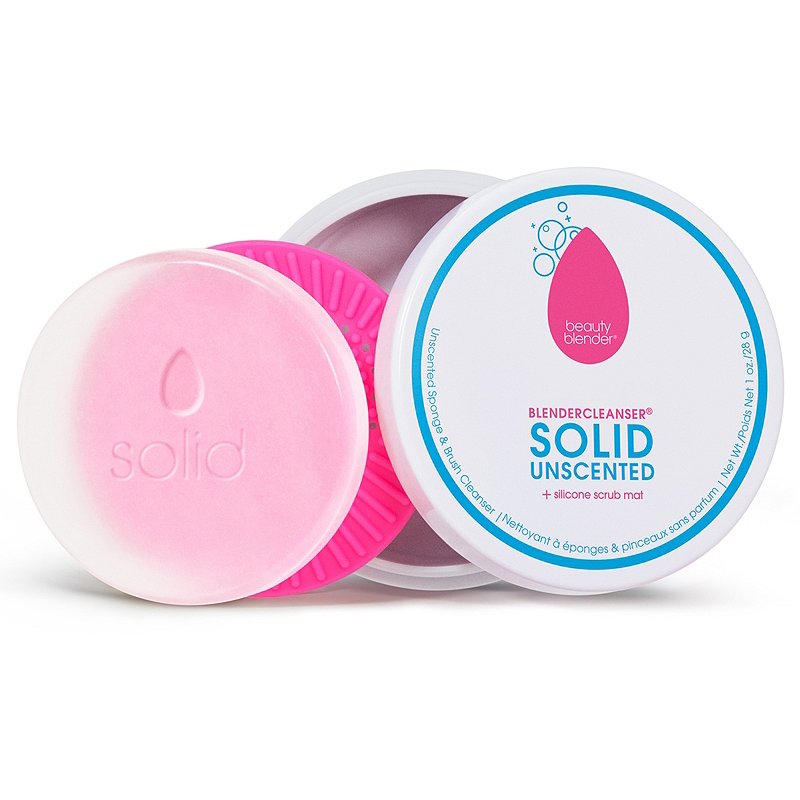
What Is the Best Brush Cleaner?
- NYX Professional Makeup On The Spot Makeup Brush Cleaner Spray
- Real Techniques Makeup Brush Cleansing Gel
- Beautyblender Blendercleanser Solid Unscented Sponge & Brush Cleanser
You can cleanse your brushes using two main methods: either with a gentle cleanser and warm water or with an alcohol-based solution that dries instantly.
You can find special cleansing solutions for makeup brushes that are very gentle and won’t affect the bristles. They can be more or less foaming, but with no harsh cleansing agent because this would strip your brushes too much and make them rough. In time, this would affect not only the way the bristles feel against the skin, but it can also make them fall out.
You could also use another cleanser, not necessarily one made especially for makeup brushes; make sure it’s a very gentle one, like baby shampoo or a mild facial cleanser.
The best way is to put a bit of cleanser into your palm, run the brush under warm tap water, then gently swirl it in the palm of your hand. The bristles should start foaming and release the product; put the brush under running water again, and check for spots. If it still looks dirty, repeat the whole process until it rinses clean.
Now put the brush on a clean towel or paper tissue and leave it to air dry, horizontally or with the handle elevated. Never let the brushes dry with the bristles upwards because the water will get in the handle and gradually break down the glue that holds the bristles together.
If using a disinfectant solution to clean your brushes, you have to generously spray the liquid onto the bristles, leave it for a few seconds, then gently swirl it on a paper tissue. These types of solutions are alcohol-based, and they break down the dirt while disinfecting at the same time.
The brushes will dry instantly because the alcohol evaporates quickly, so they are very practical when you are in a rush. It’s ok to use this spray solution for a quick cleanse, but give your brushes a thorough wash regularly, especially the ones for creamy or liquid products, as these form bacteria faster.
You can also use a solid makeup cleanser that comes in a little metal container. You can put your brush under running water, swirl it directly in the pan, and then rinse it until it’s clean. Let it air dry exactly like you would when washed with the special wash gel.
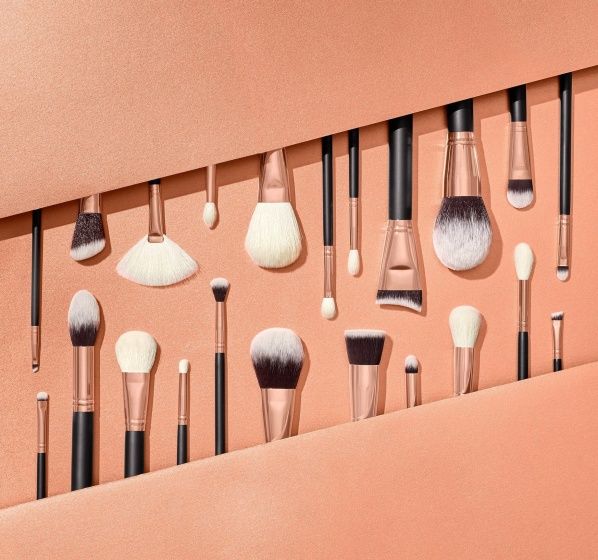
Start Your Own Brush Collection
Creating a makeup tool kit can be a very fun process, and you now have a great starting point with this extensive guide. But as always in makeup, you can also bend some rules and get creative, and the type of brushes and tools you choose are no exception.
When you get comfortable with makeup tools, you will find that one brush can have many uses. So after you’ve created a basic makeup tool kit, it’s up to you to increase this collection based on preference and personal style.
You can choose multi-use tool sets, meaning ones that include basic face and eye brushes. These will help you to get started and are often excellent value for money, compared to buying each brush separately.
- Stroke of Luxe 18-Piece Rose Gold Brush Set
- BH Cosmetics Crystal Quartz – 12 Pc Brush Set with Cosmetic Bag
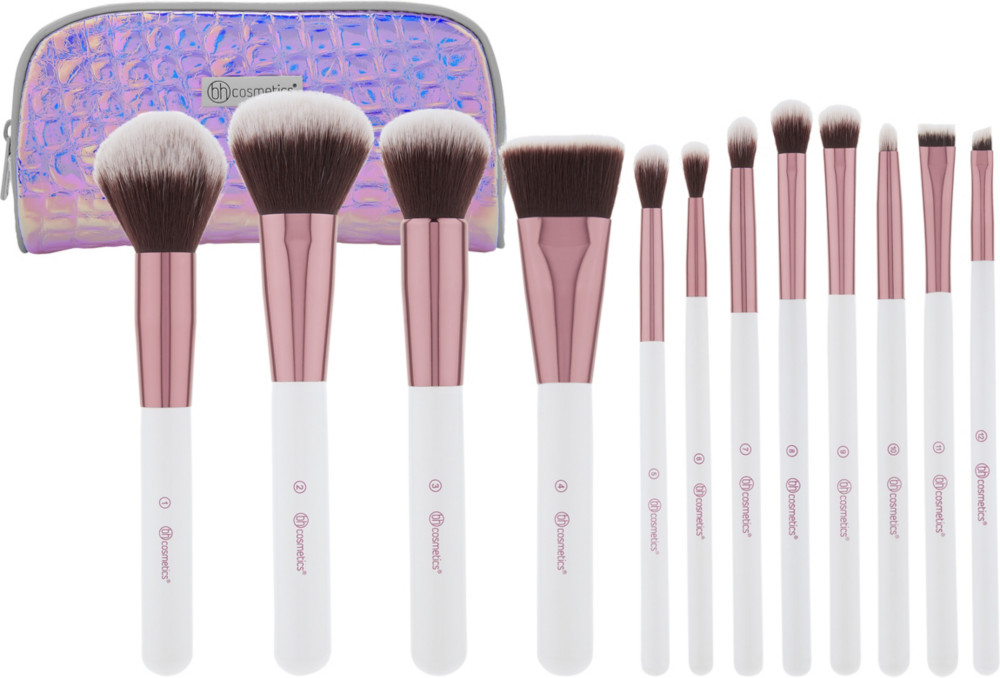
- Real Thechniques Everyday Essentials Kit